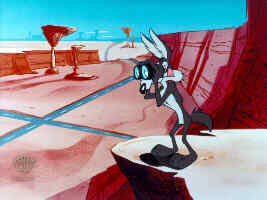
Many people want to photograph their cels, and Andy Paterson, Alan Rice and I have worked out a few methods that work quite well. There are four factors that make cels harder to photograph than most ordinary objects. The first is reflections. Anything in front of the cel, that is light colored will reflect in the plastic, and show up in the final shot. Related to reflections is glare. If a light source is to close to the camera, it will reflect off the plastic, and completely obscure the image. Glare is even harder to control than reflections. It will show up in scratches and waves that ordinarily can't be seen. The next problem is shadows. As you move the light further to the side of a cel to eliminate glare, the image starts to cast a shadow on the background. (See the "Buster" cel). Another problem that occurs when you shift the light off center, is uneven lighting (see the Maid Marion cel).
Method 1 -- Good Still Camera, Good Strobe Lights
Start by working in a room that can be easily darkened. This will cut reflections greatly. Also, cover anything
that is directly facing the cel (such as the tripod) with black fabric. Place the cel in a position where it is easy to
work around. I lean mine against a wall at about a 15-degree angle. Position the camera on a tripod, and
zoom and focus until the image is framed the way you want it. Move as far back as possible and zoom in. This
will reduce distortions, and help cut reflections and glare. Through the camera, look for obvious reflections, if
you see any, cover the object with black cloth. Now turn down the lights. Anything covered in black should
disappear from the image. Here is where an assistant will be very valuable. Have the assistant hold a very
bright flashlight in one spot, and pan beam around to cover the entire image, including the corners. If you see
any glare through the camera, have the assistant move the light to a new spot and try again. When a good spot
is found, place a strobe there. Turn the lights off, and take the picture. This method works well if the cel in flat
against the background. Quite often, the cel is off the background, and a single strobe will leave a shadow, or
give you uneven lighting. To correct for shadows, try laying the cel flat on the ground, and shooting straight
down. This can be quite tricky, so a better solution is to use a slave strobe opposite the first. Be sure to check
for glare when positioning the slave strobe.
Method 2 -- Good Still Camera, Natural Light
Take the cel outside and find some well lit shade. This will give you even, glareless light. A bright, overcast
day would work well. Now comes the hard part. Everything is going to reflect. By moving back from the cel,
fewer objects will reflect, but the camera and tripod will probably still show up. By adjusting the cel, camera,
and a large black sheet, you can eventually eliminate the reflections. If you try this stunt in your front yard,
you may attract a crowd. If you still have a reflection problem, try narrowing the depth of field to just the cel.
You may be able to unfocus the reflection enough to take the shot. The big advantage with this method, is that
you don't have to mess with strobes, or other lights. Just be sure that you still have enough light getting past
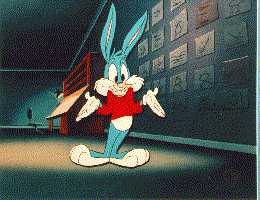
your black sheet to evenly light the cel. As a test, the "Babs" and "Wile" cels were photographed this way.
Method 3 -- Computer Scanner
Scan the cel directly with a computer scanner. If your cel, is not yet framed, a computer scanner, will do a
great job, usually without any glare or reflections. You won't have a photograph when you are done, but a
color (or even black and white) printout will be good enough for most uses (the Pongo and Goliath cels
were done this way). If your cels are already framed, don't remove them. Believe it or not, some scanners will
do a good job, even scanning through a frame. It is worth a try, and you will probably be pleasantly surprised
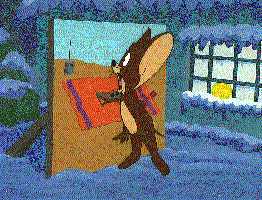
by the results (see the "Jerry" cel). I still photograph each of my cels,
when possible and then scan the photos, but if that is not possible, this method works pretty well.
Method 4 -- Video Camera, Video Capture Board,
Using lighting methods 1 or 2, use a video camera and video capture board to bring the image directly into a
computer. It is much easier to check what the final results will be, because you can see it directly while you are
setting things up. There is also the instant gratification factor. You don’t have to wait for the roll of film to be
used up before you get prints. Don’t start thinking however, that this method is with out it’s bad sides. The
first drawback to this method is that at best resolution you can get is probably 640 X 480 and maybe less.
Secondly, Even a color printout probably won’t do your cel justice as far as color goes. All things considered, I
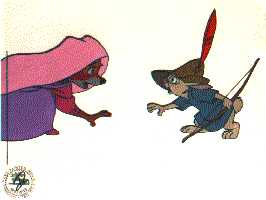
recommend this method highly if you have the equipment. For an example, Check out this Robin Hood cel.
Method 5 -- Video Tape, Video Capture Board
Who needs lights, cameras, or scanners (or even cels for that matter)? If you have a video capture board and a
tape of the animation your cel is from, you can capture it directly from the tape. If you have ordered a cel but
have not yet received it, this method is like magic. Sounds to good to be true doesn’t it? It is. This method can
work fairly well, but you had better have pretty good equipment or the results won’t be worth the effort. As an
example, my cheap video capture board doesn’t do well on freeze frame captures. Strangely enough, it works
fine with live shots of a still subject. This means that I have to capture the cel on the fly. Not too big a
problem, except that it won’t capture moving video any larger than 160 X 120. A good graphics program can
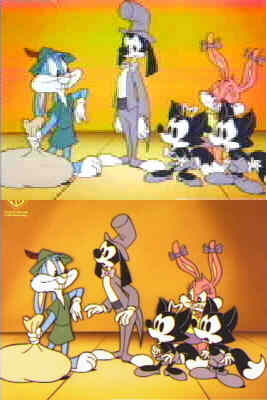
expand this a little, but don’t expect too much. For a good example, look at the "Two Tone" example below.
Another, less obvious problem is that your cel might be a composite of the scene, and not be on the video tape
exactly the way it appears on your wall. Cels with more than one character usually use a different layer for
each character. To create a better looking finished product, the studio may combine the best cel of character A
with the best cel of character B from a particular scene. Usually, theses cels are only a few milliseconds apart,
but the changes can be dramatic. To see what I am talking about, look at this comparison of a cel from Two Tone Town, in the cel that I bought (lower), Babs Bunny is more
visible and her teeth are showing, taken from a cel about 1/2 a second after the first one.
With a little practice and a little luck, you should be able to photograph your cels with great results.
Note:
Other than the examples pointed out here, don't judge a method strictly by the images on my page. They have
been reduced to a height of only 200 pixels, and then heavily JPEG compressed to reduce the files to a
manageable size. Your display may further reduce the colors to what your system can handle. An example of
this can be seen in the Pongo background. I assure you that the
background looks smooth and even (and nice) in the original image.